Running your own ARK dedicated server gives you control over the survival experience, from taming rates and difficulty settings to private access, player limits, and custom mods. Whether you are creating a small world for friends or building a public dinosaur survival community, a properly configured server provides more flexibility than relying on someone else's game session.
Learning how to set up an ARK dedicated server starts with an important distinction: ARK: Survival Ascended (ASA) and ARK: Survival Evolved (ASE) use different dedicated server applications, mod systems, and compatibility requirements.
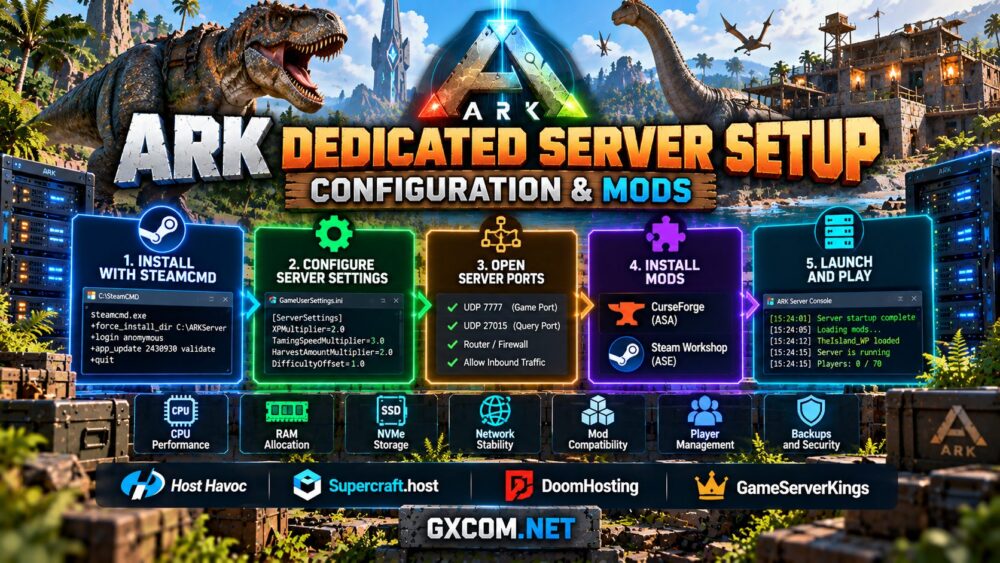
This guide explains how to install the server files with SteamCMD, configure gameplay settings, open network ports, install compatible mods, and decide when managed hosting makes more sense than running the infrastructure yourself.
ARK Dedicated Server Requirements: ASA vs ASE
Before downloading anything, confirm which ARK edition your players own. ASA and ASE are separate games, and players cannot join servers running the other edition.
ASA generally requires more generous hardware resources than ASE, particularly for large maps, active communities, and heavily modified worlds. Both editions benefit from modern CPUs, adequate RAM, fast SSD or NVMe storage, and a stable network connection.
| Feature | ARK: Survival Ascended | ARK: Survival Evolved |
|---|---|---|
| SteamCMD server App ID | 2430930 | 376030 |
| Game engine | Unreal Engine 5 | Unreal Engine 4 |
| Typical resource demand | Higher memory headroom recommended | Generally lighter for comparable worlds |
| Mod ecosystem | CurseForge | Steam Workshop on supported PC servers |
| Native server platform | Windows; Linux commonly uses compatibility solutions | Windows and Linux |
There is no single RAM figure that guarantees smooth performance. Map size, installed mods, active players, structures, and background services all affect resource consumption.
For more detailed planning, read our ARK Survival Ascended server requirements guide.
Step 1: Install SteamCMD and Download the Server
SteamCMD is Valve's command-line utility for installing and updating dedicated server applications. On Windows, download SteamCMD from Valve's official documentation, extract it into a dedicated directory, and run it once to complete its initial update.
Create a separate folder for the ARK installation. For ASA, open a command prompt in the SteamCMD directory and run:
steamcmd.exe +force_install_dir C:\ARKServer\ASA +login anonymous +app_update 2430930 validate +quitFor ASE, use its separate application ID and installation directory:
steamcmd.exe +force_install_dir C:\ARKServer\ASE +login anonymous +app_update 376030 validate +quitDo not install both editions into the same directory. Their server files are not interchangeable, and keeping separate installations makes updates and backups easier to manage.
ASE also supports native Linux dedicated server installations. ASA's standard dedicated server distribution is Windows-based, so Linux deployments commonly require a compatible runtime or a hosting solution that manages that compatibility layer.
After the download completes, confirm that the server executable exists and that sufficient disk space remains for maps, saves, updates, and backups.
Step 2: Configure and Launch Your ARK Server
ARK dedicated servers use startup parameters and configuration files to define the map, server name, player access, ports, and gameplay behavior.

For ASA on Windows, a basic startup batch file can use the following structure. Adjust the installation directory and map name to match your environment:
@echo off
cd /d C:\ARKServer\ASA\ShooterGame\Binaries\Win64

ArkAscendedServer.exe TheIsland_WP?SessionName=MyARKServer?ServerPassword=CHANGE_ME?ServerAdminPassword=USE_A_STRONG_PASSWORD?Port=7777?QueryPort=27015 -log

pause
This example creates a password-protected server. Replace both example passwords before starting it. For a public server, omit the player-access password if you intend to allow unrestricted joining, while keeping a strong administrator password.
For ASE, the executable and map syntax differ:
@echo off
cd /d C:\ARKServer\ASE\ShooterGame\Binaries\Win64

start ShooterGameServer.exe TheIsland?listen?SessionName=MyARKServer?ServerPassword=CHANGE_ME?ServerAdminPassword=USE_A_STRONG_PASSWORD?Port=7777?QueryPort=27015 -server -log
These are starting examples rather than universal templates. Additional flags may be needed for specific maps, cluster configurations, platform restrictions, or custom deployments.
The first startup may take considerable time while the game initializes its world files. Watch the server console for errors before attempting to connect.
Step 3: Configure GameUserSettings.ini, Game.ini, and Network Ports
Two important ARK configuration files are GameUserSettings.ini and Game.ini. They control many gameplay and server behavior settings.
For a typical Windows dedicated installation, these files are located under the game's ShooterGame\Saved\Config\WindowsServer directory. Confirm the actual configuration path used by your edition and hosting environment.
In GameUserSettings.ini, administrators can configure settings such as experience multipliers, taming speed, harvesting rates, and other gameplay preferences. A simplified example is:
[ServerSettings]
XPMultiplier=2.0
TamingSpeedMultiplier=3.0
HarvestAmountMultiplier=2.0
More advanced rules can be configured through Game.ini, including supported progression, creature, and gameplay overrides. Always use parameters documented for your specific edition; not every ASE setting behaves identically in ASA.
ARK also requires correctly configured network access. Common deployments use UDP 7777 for gameplay and UDP 27015 for server queries, but additional ports or different mappings may be required by the edition, launch options, or hosting environment.
Open only the necessary ports in the operating system firewall and cloud security rules. If hosting from home, configure router port forwarding and verify that your internet connection permits inbound traffic.
For public servers, use strong administrative credentials, keep remote management restricted, and avoid exposing unrelated system services.
Step 4: Install Mods and Manage Custom Content
Mods are one of ARK's most attractive features, but ASA and ASE use different distribution systems.
ARK: Survival Ascended uses the CurseForge mod ecosystem. Dedicated server administrators can enable compatible mods through supported server configuration or startup options, commonly using a -mods= argument with the appropriate mod identifiers.
For example, a supported ASA deployment may include:
-mods=MOD_ID_1,MOD_ID_2Replace these placeholders with valid ASA mod identifiers. Confirm that the mods support your server build, map, and intended client platforms before enabling them.
ARK: Survival Evolved commonly uses Steam Workshop mods on supported PC servers. ASE installations can use the ActiveMods configuration entry:
[ServerSettings]
ActiveMods=123456789,987654321
These example IDs are placeholders, not real mod recommendations. Obtain the correct IDs from the mod's official distribution page.
Do not assume an ASE Workshop mod will run on ASA. The two editions have different mod environments, and equivalent gameplay features may require separate versions.
After changing mods, restart the server, review startup logs, and test player connectivity. Back up world and configuration data before major mod updates or removals.
Our ARK Survival Ascended vs Evolved hosting comparison explains these compatibility differences in greater detail.
Step 5: Connect Players, Manage Backups, and Maintain Stability
Once the server has finished loading, connect using the appropriate in-game server browser or supported direct-connection method. Public server discovery can take time, and some environments require edition-specific query settings.
If players cannot connect, check that the server process is running, the correct ports are reachable, and the client and server editions match. Also verify that required mods are available and that no firewall or hosting security rule is blocking traffic.
Routine maintenance should include server updates, monitoring CPU and memory usage, checking disk space, and keeping regular backups of saves and configuration files.
For multi-map clusters, plan resources for every active map rather than assuming one server instance can handle the entire cluster. Additional maps increase memory consumption, storage requirements, and operational complexity.
Modern processors with strong per-core performance can be valuable for demanding ARK communities. Our AMD Ryzen dedicated game server guide explains the hardware considerations for multiplayer hosting.
Managed ARK Hosting vs Self-Hosted Dedicated Servers
Installing ARK yourself provides flexibility, but it also means managing operating system updates, security, backups, mod compatibility, and troubleshooting.

Host Havoc is a relevant managed game hosting option for ARK communities that prefer a control panel and provider support. Compare its current ASA and ASE offerings, server locations, available resources, and backup options before ordering.
Supercraft.host is another game hosting provider worth evaluating for ARK-related workloads. Confirm the exact edition supported by the selected product, together with mod installation methods and server management features.
DoomHosting offers ARK: Survival Ascended hosting options and management features. It may suit administrators who want to work with ASA worlds and compatible mods without maintaining the underlying server environment themselves.
GameServerKings can also be considered when comparing game hosting and dedicated infrastructure. Verify the current availability of ARK-specific products, the supported edition, and the level of management included with each service.
These providers do not necessarily offer identical products. A managed game server, a virtual machine, and an unmanaged dedicated server have different responsibilities and levels of control.
For a broader provider comparison, explore our best ARK server hosting guide. If you are deciding whether to manage the operating system yourself, our managed vs self-hosted game servers article explains the trade-offs.
Final Thoughts
Setting up an ARK dedicated server is manageable when you separate the process into installation, configuration, networking, mod management, and ongoing maintenance.
The most important decision is choosing the correct game edition. ASA and ASE use different server applications and mod ecosystems, so installation commands and configuration examples should never be mixed without verification.
Self-hosting is suitable for administrators who want complete control over their environment. Managed ARK hosting is often more convenient for communities that prefer to focus on gameplay, player administration, and custom content.
Start with a small test world, verify that players can connect, establish reliable backups, and expand only after confirming that your hardware and configuration can support the intended community.