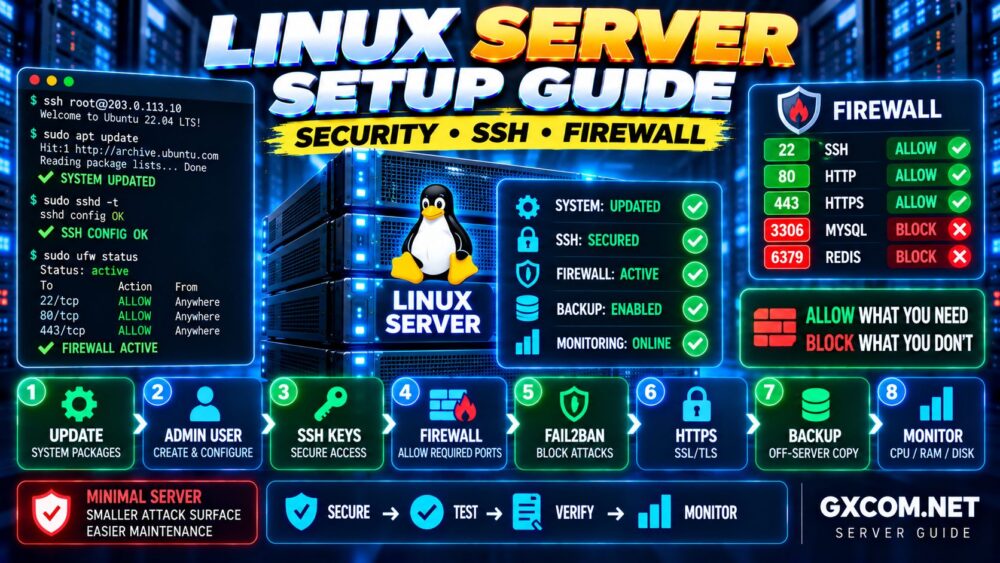
You have purchased a VPS, received an IP address and login credentials, and now you are looking at an empty server wondering what to do next.
Setting up a VPS correctly involves much more than simply connecting through SSH and installing a website.
A secure VPS setup should include system updates, user accounts, SSH security, firewall rules, time synchronization, web server configuration, SSL certificates, backups and basic monitoring.
This beginner-friendly guide explains how to set up a VPS server step by step, from your first SSH connection to deploying a secure website.
VPS Setup: Connect → Update → Create User → Secure SSH → Configure Firewall → Install Software → Enable HTTPS → Back Up → Monitor.
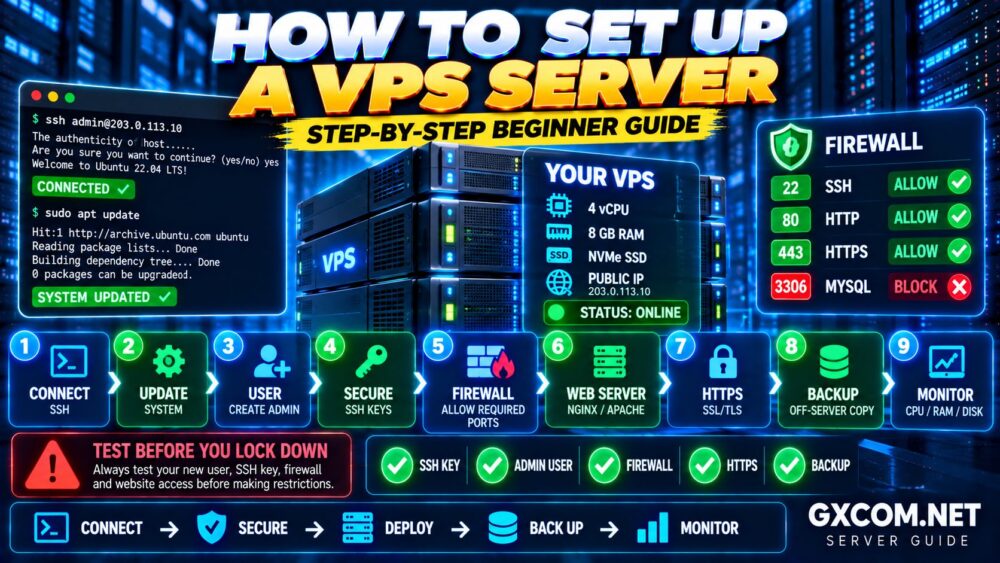
What Is a VPS Server?
A Virtual Private Server (VPS) is a virtual machine running on physical server infrastructure.
Unlike traditional shared hosting, a VPS normally gives you much greater control over the operating system, installed software, server configuration and allocated resources.
A typical VPS plan may provide:
- Virtual CPU cores
- Dedicated or allocated RAM
- SSD or NVMe storage
- Public IPv4 and/or IPv6 addresses
- Root or administrator access
- Network bandwidth or traffic allowance
- A choice of operating systems
This flexibility makes VPS hosting useful for websites, WordPress, APIs, development environments, databases, applications, VPNs and many other workloads.
But greater control also means greater responsibility.
With an unmanaged VPS, you may be responsible for securing, updating, configuring, monitoring and backing up the server yourself.
Managed vs Unmanaged VPS: Know What You Purchased
Before configuring anything, determine whether your VPS is managed or unmanaged.
| Feature | Managed VPS | Unmanaged VPS |
|---|---|---|
| Server Setup | Provider may assist | You manage it |
| OS Updates | May be managed | Your responsibility |
| Security | Provider may assist | Your responsibility |
| Web Server | Often preconfigured | You install/configure it |
| Troubleshooting | More support | Usually limited |
| Cost | Usually higher | Usually lower |
If you have an unmanaged VPS, do not assume the provider will configure Apache, Nginx, PHP, databases, firewalls or application security for you.
If you are still deciding between the two approaches, read our Managed vs Unmanaged VPS comparison.
What Do You Need Before Setting Up a VPS?
Before starting, collect the following information from your VPS provider:
- Server IP address
- Root username or initial administrator account
- Initial password or SSH key
- Operating system
- Provider control panel access
- Recovery/rescue console access
- DNS information if applicable
You should also have:
- An SSH client
- A domain name if hosting a website
- A backup plan
- A clear idea of what the VPS will run
For this guide, the command examples assume a typical Ubuntu/Debian-based Linux VPS unless otherwise stated.
Commands and package names can differ on AlmaLinux, Rocky Linux, Debian, Ubuntu and other distributions, so always verify commands for your exact operating system.
Step 1: Connect to Your VPS Using SSH
SSH is the standard method for remotely administering most Linux VPS servers.
On macOS, Linux and modern Windows systems with an SSH client available, open a terminal and enter:
ssh root@YOUR_SERVER_IP
For example:
ssh [email protected]
The first time you connect, SSH may ask you to confirm the server's host key fingerprint.
Ideally, verify the fingerprint through your VPS provider's console or documentation before accepting it.
Then authenticate using the credentials or SSH key supplied by your provider.
If your provider uses another initial username, replace root accordingly.
Step 2: Change Any Temporary Password
If your VPS provider supplied a temporary root password, replace it with a strong unique password.
passwd
A strong administrative password should be:
- Long
- Unique
- Not reused on another service
- Stored securely in a password manager
However, password strength alone should not be your primary SSH defense.
Later in this guide, we will configure SSH keys and reduce dependence on password-based remote login.
Step 3: Update the VPS Operating System
A newly provisioned VPS image may already have pending security and package updates.
On Ubuntu or Debian:
apt update
apt upgrade -y
After significant system updates, determine whether a reboot is required.
You can reboot when appropriate with:
reboot
Your SSH connection will close during the reboot.
Wait for the server to return online and reconnect.
New VPS ≠ Fully Updated VPS.
Step 4: Set the Server Hostname
A meaningful hostname makes server administration easier, particularly when you eventually manage multiple servers.
For example:
hostnamectl set-hostname web01.example.com
Check it with:
hostnamectl
Use a naming convention that makes sense for your infrastructure.
Examples:
web01.example.com
db01.example.com
app01.example.com
A clear naming system becomes increasingly useful as infrastructure grows.
Step 5: Check the Server Time and Timezone
Accurate system time is important for logs, TLS certificates, authentication, scheduled tasks and troubleshooting.
Check the current status:
timedatectl
If you need to change the timezone:
timedatectl set-timezone UTC
UTC is commonly used on servers because it simplifies logs across multiple geographic locations, although you can choose the timezone appropriate for your environment.
Step 6: Create a Non-Root User
Using the root account for every administrative task is not ideal.
Create a separate user:
adduser adminuser
Then give the user administrative privileges on Ubuntu/Debian:
usermod -aG sudo adminuser
Test the account before disabling any root SSH access.
Open a second terminal and try:
ssh adminuser@YOUR_SERVER_IP
Then verify sudo access:
sudo whoami
If configured correctly, the result should be:
root
Important: Never disable your existing administrative access until you have confirmed the new account works.
Step 7: Configure SSH Key Authentication
SSH keys are generally preferable to relying only on passwords for remote server administration.
On your local computer, you can create a modern Ed25519 SSH key:
ssh-keygen -t ed25519
Your public key typically ends in:
.pub
The private key stays on your local system and must be protected.
On systems with ssh-copy-id, you can copy the public key to the VPS:
ssh-copy-id adminuser@YOUR_SERVER_IP
Alternatively, add the public key to:
~/.ssh/authorized_keys
on the server for the appropriate user.
Then test key authentication in a new terminal before making further SSH restrictions.
Never upload or share your private SSH key.
Step 8: Secure the SSH Configuration
The SSH daemon configuration is commonly located at:
/etc/ssh/sshd_config
or may use additional configuration files under:
/etc/ssh/sshd_config.d/
Depending on your environment, security settings may include restricting direct root login and disabling password authentication after key-based access is confirmed.
Examples can include:
PermitRootLogin no
PasswordAuthentication no
PubkeyAuthentication yes
Do not blindly paste settings into a production server.
First confirm:
- Your non-root administrative user works
- Your SSH key works
- You have sudo access
- You have provider console/recovery access
After editing SSH configuration, validate it before restarting or reloading SSH:
sshd -t
If no error is returned, reload the appropriate SSH service for your distribution.
Test First → Restrict Second.
Should You Change the Default SSH Port?
Changing SSH from port 22 to another port can reduce some automated scanning noise, but it should not be treated as a substitute for real security controls.
The important protections are:
- SSH keys
- Strong authentication
- Restricted root access
- Firewall rules
- Updates
- Monitoring
Different SSH Port ≠ Secure SSH by Itself.
Step 9: Configure a Firewall
A firewall should expose only the services your VPS actually needs.
Ubuntu commonly supports UFW as a convenient firewall management layer.
Before enabling a firewall, make sure SSH will remain allowed.
For a standard SSH service:
ufw allow OpenSSH
If you plan to run a website:
ufw allow 80/tcp
ufw allow 443/tcp
Then enable UFW:
ufw enable
Check the status:
ufw status verbose
A basic public web server normally needs only the ports required for its actual services.
For example:
| Port | Typical Service | Public? |
|---|---|---|
| 22 | SSH | Restrict where practical |
| 80 | HTTP | Yes for web server |
| 443 | HTTPS | Yes for secure website |
| 3306 | MySQL | Usually No |
| 5432 | PostgreSQL | Usually No |
Do not expose a database to the public internet unless your architecture genuinely requires it and appropriate access controls are in place.
Step 10: Install Basic Server Utilities
Useful packages vary by workload, but a basic Ubuntu/Debian server may benefit from tools such as:
apt install curl wget unzip git htop -y
Install only what you actually need.
Every unnecessary service or package can add maintenance overhead and potentially increase the attack surface.
Step 11: Decide What Your VPS Will Run
Before installing a web stack, determine your workload.
A VPS may run:
- WordPress
- Static websites
- PHP applications
- Node.js applications
- Python applications
- Docker containers
- Databases
- APIs
- Development environments
Do not install Apache, Nginx, MySQL, Docker and every other server package simply because a tutorial lists them.
Workload → Software Stack → Resources → Configuration.
Step 12: Install a Web Server
If the VPS will host websites, two common web servers are Nginx and Apache.
Install Nginx
apt install nginx -y
Check its status:
systemctl status nginx
If the firewall is configured correctly, visiting the server IP in a browser should display the default Nginx page.
Install Apache
Alternatively:
apt install apache2 -y
Check:
systemctl status apache2
You generally do not need both Apache and Nginx serving the same ports unless you intentionally design an architecture using both.
Nginx vs Apache: Which Should a Beginner Choose?
Both are mature and widely used.
Nginx is popular for efficient static-file serving, reverse proxying and high-concurrency workloads.
Apache remains widely supported and is common in traditional hosting environments, particularly where applications rely on Apache-specific behavior such as .htaccess.
For a beginner, the better choice is usually the server that best matches your application and the documentation you can reliably maintain.
Correct Configuration > Web Server Brand.
Step 13: Install PHP If Your Application Requires It
WordPress and many other applications require PHP.
For example, on Ubuntu/Debian you may install PHP and commonly required extensions through your distribution's package manager.
The exact packages and supported PHP versions change over time, so choose a currently supported version compatible with your application rather than blindly copying an old version-specific command.
After installation, verify:
php -v
Do not install obsolete PHP versions simply because an old tutorial uses them.
Step 14: Install a Database If Needed
Applications such as WordPress require a database.
Common options include:
- MySQL
- MariaDB
- PostgreSQL
Install the database appropriate for your application and secure it according to the current documentation for your distribution and database version.
For a standard single-server WordPress deployment, the database usually does not need to listen publicly on the internet.
Keep database access limited to the application/server environment whenever possible.
Step 15: Point Your Domain to the VPS
Once your web server is working, point your domain to the VPS.
A typical DNS configuration may include:
example.com      A      YOUR_SERVER_IPV4
www.example.com  A      YOUR_SERVER_IPV4
Or www may use a CNAME depending on your DNS architecture.
If you use IPv6, configure the appropriate AAAA record only when the VPS and web server are correctly prepared to serve traffic over IPv6.
Do not leave an old AAAA record pointing to another server.
Step 16: Configure the Website Virtual Host
Your web server needs to know which website should answer requests for your domain.
For Nginx, this normally involves a server block.
For Apache, it normally involves a VirtualHost.
A simplified Nginx example:
server {
    listen 80;
    server_name example.com www.example.com;

    root /var/www/example.com;
    index index.html index.php;
}
After changing Nginx configuration, test it:
nginx -t
For Apache:
apachectl configtest
Always validate web server configuration before reloading production services.
Step 17: Install an SSL Certificate
Once DNS points to the VPS and the website responds correctly, enable HTTPS.
Many VPS users choose an automated certificate solution such as Let's Encrypt with an ACME client.
Your final website should load at:
https://example.com/
and HTTP should redirect to the appropriate HTTPS URL.
Our step-by-step SSL certificate installation guide covers certificate installation, HTTPS redirects, mixed content and renewal in more detail.
Do not consider SSL complete until automatic renewal is working.
Step 18: Enable Automatic Security Updates Carefully
Keeping server packages patched is essential.
On Ubuntu, administrators can use tools such as unattended upgrades to automate eligible security updates.
However, automatic updates should still be monitored.
For production infrastructure:
- Know what is being updated
- Monitor update failures
- Maintain backups
- Plan for services requiring restarts
- Test major application/runtime upgrades
Automatic Updates ≠ Zero Administration.
Step 19: Protect Against Brute-Force Login Attempts
Public SSH servers are routinely scanned by automated systems.
Good SSH security starts with strong authentication and limited exposure.
Additional tools such as Fail2ban can monitor repeated failed authentication attempts and apply temporary blocks based on configured rules.
However, Fail2ban should supplement—not replace—SSH keys, firewall rules, updates and secure account configuration.
Step 20: Configure Backups Before You Need Them
A VPS snapshot is useful, but it should not automatically be treated as your entire backup strategy.
A robust backup plan may include:
- Application files
- Databases
- Configuration files
- Off-server backup copies
- Retention history
- Restore testing
The most important question is not:
“Do I have a backup?”
It is:
“Can I successfully restore the server or application from that backup?”
Backup ≠ Recovery Until Restore Is Tested.
Step 21: Set Up Basic Server Monitoring
You should know when the VPS is running out of resources or becoming unavailable.
At minimum, monitor:
- CPU usage
- RAM usage
- Disk space
- Disk I/O
- Network traffic
- Load average
- Web server status
- Database health
- Uptime
- Certificate expiration
Useful built-in commands include:
top
htop
free -h
df -h
uptime
Monitoring trends is often more useful than reacting to a single high CPU reading.
Step 22: Check Disk Space
A server can fail even when CPU and RAM look normal if the disk becomes full.
Check filesystem usage:
df -h
Common causes of unexpected disk growth include:
- Log files
- Database growth
- Backups stored locally
- Application uploads
- Temporary files
- Container images
Do not wait until disk usage reaches 100% before investigating.
Step 23: Check Memory Usage
Use:
free -h
Linux memory statistics can initially confuse beginners because the operating system uses available RAM for caching.
Do not conclude that the VPS needs more RAM simply because a large amount appears “used.”
Evaluate available memory, swap activity, application behavior and whether processes are being terminated because of memory pressure.
Step 24: Check CPU and Load
Commands such as:
top
htop
uptime
help identify CPU-intensive processes and system load.
But:
High Load ≠ Always CPU Problem.
Processes waiting on disk I/O or other resources can also contribute to system load.
When a server feels slow, diagnose the actual bottleneck before purchasing a larger VPS.
Step 25: Do Not Ignore Disk I/O
Two VPS plans with the same:
4 vCPU + 8 GB RAM
can perform very differently.
Storage performance, CPU allocation, host contention and provider infrastructure all matter.
Disk-intensive databases and applications can be limited by storage even when CPU and RAM appear sufficient.
This is one reason NVMe storage is attractive for database-heavy and I/O-sensitive workloads.
How Much CPU and RAM Does a VPS Need?
There is no universal VPS size because resource requirements depend on the workload.
| Workload | Possible Starting Point |
|---|---|
| Small Static Site | 1 vCPU / 1 GB RAM |
| Small WordPress Site | 1–2 vCPU / 2 GB RAM |
| Growing WordPress Site | 2–4 vCPU / 4–8 GB RAM |
| Application / API | Depends heavily on workload |
| Database-Heavy Workload | More RAM + fast storage may matter |
These are starting points, not guaranteed requirements.
Measure the actual application before upgrading.
More CPU ≠ Automatically Faster Website.
Common VPS Setup Mistakes Beginners Make
1. Using Root for Everything
Create a separate administrative user and use elevated privileges only when necessary.
2. Leaving Password-Only SSH Exposed
Configure SSH keys and appropriate authentication policies.
3. Enabling a Firewall Before Allowing SSH
This can lock you out of the VPS.
4. Disabling Root Login Before Testing the New User
Always verify alternative administrative access first.
5. Opening Every Port
Expose only services that genuinely need external access.
6. Exposing the Database Publicly
For many single-server deployments, this is unnecessary.
7. Forgetting Backups
A VPS provider's infrastructure does not automatically protect your application data from every failure or mistake.
8. Forgetting SSL Renewal
An expired certificate can interrupt normal website access.
9. Installing Unnecessary Software
More software means more components to update, monitor and secure.
10. Upgrading Before Diagnosing
A larger VPS will not fix every database query, application bug, disk bottleneck or network problem.
VPS Security Checklist
After the initial setup, verify:
- ✓ Operating system updated
- ✓ Strong administrative credentials
- ✓ Non-root sudo user created
- ✓ SSH key authentication tested
- ✓ Root SSH access policy reviewed
- ✓ Password authentication policy reviewed
- ✓ Firewall enabled
- ✓ Only required ports exposed
- ✓ Database access restricted
- ✓ HTTPS enabled
- ✓ Automatic certificate renewal configured
- ✓ Backups configured
- ✓ Restore process understood
- ✓ Monitoring enabled
Should You Install a Control Panel on Your VPS?
A hosting control panel can simplify website, domain, database, email and SSL administration.
However, control panels also consume resources and introduce another software layer that must be secured and updated.
A control panel may make sense if:
- You host multiple websites
- You prefer graphical administration
- You manage hosting accounts
- You do not want to configure every service manually
A minimal command-line server may be better when:
- You run one application
- You want lower overhead
- You understand Linux administration
- You use automated deployment tools
Choose based on the workload and administration model rather than assuming every VPS needs a control panel.
Should You Use Docker on a New VPS?
Docker can simplify application packaging and deployment, but beginners do not need Docker simply because they purchased a VPS.
Docker introduces concepts such as:
- Containers
- Images
- Volumes
- Networks
- Port mappings
- Container security
If your application already has a well-maintained container deployment, Docker can be an excellent choice.
If you are learning basic Linux server administration, adding containers immediately can make troubleshooting more complicated.
How Long Does It Take to Set Up a VPS?
A basic Linux VPS can be prepared relatively quickly, but a production-ready server should not be rushed.
The time depends on:
- Operating system
- Application stack
- Security requirements
- DNS
- SSL
- Database configuration
- Backups
- Monitoring
The goal should not be:
“How fast can I get the website online?”
but:
“Can I operate, secure, back up and recover this server reliably?”
Do You Need a Managed VPS Instead?
If tasks such as Linux updates, SSH security, firewall configuration, web server troubleshooting, backups and monitoring feel overwhelming, a managed VPS may be worth the additional cost.
Unmanaged VPS hosting is attractive because it can be inexpensive and flexible, but your time also has value.
Compare:
Server Price + Management Time + Security + Backups + Downtime Risk
rather than comparing only the monthly VPS price.
If you are still shopping for infrastructure, our Best VPS Hosting guide compares VPS options for different workloads.
VPS Setup Troubleshooting
| Problem | Check First |
|---|---|
| Cannot connect with SSH | IP, port, firewall, credentials, SSH service |
| Website does not load | DNS, ports 80/443, web server |
| Domain points to wrong server | A/AAAA records |
| HTTPS fails | Certificate, DNS, web server configuration |
| Server feels slow | CPU, RAM, disk I/O, database, network |
| Disk full | Logs, backups, database, uploads |
| SSH locked out | Provider console, firewall, SSH configuration |
| High memory usage | Processes, available memory, swap |
VPS Server Setup FAQ
What should I do first after buying a VPS?
Connect securely, update the operating system, create an administrative user, configure SSH authentication and establish firewall rules before deploying production applications.
Is a VPS difficult for beginners?
An unmanaged VPS requires Linux and server-administration knowledge, but beginners can learn the fundamentals gradually. Managed VPS hosting is easier if you do not want responsibility for routine server administration.
Should I disable root SSH login?
Restricting direct root SSH access is a common security practice, but first create and thoroughly test another administrative account with working SSH key and sudo access.
Should I disable SSH password authentication?
Key-based authentication can reduce reliance on passwords. Before disabling password authentication, confirm that key-based login works and that you have recovery access through your provider.
Do I need a firewall on a VPS?
Yes, a firewall is an important layer for controlling which services are reachable. Configure it carefully so you do not accidentally block your own administrative access.
Do I need antivirus software on a Linux VPS?
Server security cannot be reduced to installing antivirus software. Updates, access control, application security, firewall rules, authentication, monitoring and backups are all important. Specific workloads may justify additional malware scanning.
Can I host WordPress on a VPS?
Yes. A VPS can host WordPress, but you are responsible for configuring and maintaining the web server, PHP, database, SSL, backups and security unless the VPS is managed.
How much RAM do I need for a VPS?
It depends on the application. A small workload may run with 1–2 GB, while growing WordPress sites, databases and applications may need considerably more. Monitor actual resource usage rather than choosing RAM only from generic recommendations.
Is NVMe important for a VPS?
Fast storage can help I/O-sensitive workloads such as databases and dynamic applications, but storage is only one part of VPS performance. CPU allocation, memory, network quality and provider infrastructure also matter.
Should I reboot my VPS regularly?
Do not reboot a production server arbitrarily. Reboot when required for specific system updates, maintenance or troubleshooting, and understand the effect on running services.
VPS Setup: Final Checklist
- ✓ Connect through SSH
- ✓ Update the operating system
- ✓ Configure hostname and time
- ✓ Create a non-root administrator
- ✓ Configure SSH keys
- ✓ Review root and password SSH access
- ✓ Configure the firewall
- ✓ Install only required software
- ✓ Install the application/web stack
- ✓ Configure DNS
- ✓ Configure the virtual host
- ✓ Install SSL
- ✓ Redirect HTTP to HTTPS
- ✓ Configure security updates
- ✓ Configure backups
- ✓ Test recovery
- ✓ Monitor CPU, RAM, disk and network
- ✓ Monitor SSL expiration
Final Recommendation
Learning how to set up a VPS server is really about learning how the major layers of a server work together.
Do not rush directly from receiving your VPS password to installing WordPress or uploading a website.
Build the server in a logical order:
CONNECT
↓
UPDATE
↓
CREATE ADMIN USER
↓
SECURE SSH
↓
CONFIGURE FIREWALL
↓
INSTALL APPLICATION STACK
↓
CONFIGURE DNS
↓
ENABLE HTTPS
↓
BACK UP
↓
MONITOR
And remember one rule that prevents many beginner mistakes:
TEST ACCESS BEFORE REMOVING ACCESS.
Test the new SSH user before disabling root login. Test SSH keys before disabling passwords. Allow SSH before enabling the firewall. Test HTTPS before forcing redirects. Test backups before relying on them.
A VPS gives you much more control than shared hosting—but that control becomes valuable only when the server is secure, maintainable, monitored and recoverable.